explode-the-web
 3-DOM
3-DOM
- Download and add project assets
- Add a browser action and icons
- Test the explosion script
👉 Get project assets
1. Download the `assets.zip` file you'll need to continue the tutorial.
1. Unzip the folder and place it in your `explode-tutorial` project folder.
1. Your structure should look like this >
```
/explode-tutorial/
assets/
css/
img/
libs/
js/
pages/
sounds/
background.js
content.js
manifest.json
```
Browser action
- An action adds an extension icon and popup window to the browser toolbar.
- The action is sometimes called "browser action", or "popup script".
- The action popup is an HTML page you define and has its own context (and its own DevTools console!).

👉 Add an action
1. Add a new file to the project folder called `action.html`
1. Paste in this code.
```html
<!DOCTYPE html>
```
💥 Explode Tracked Pages!
Press e + ~ to test
👉 Add the action and icons to the manifest
The icon identifies the browser extension in the `chrome://extensions` page.
1. Add this code to your manifest to add the icon and action.
1. Refresh the extension.
```json
"icons": {
"16": "assets/img/explosion-icon16.png",
"32": "assets/img/explosion-icon32.png",
"64": "assets/img/explosion-icon64.png",
"128": "assets/img/explosion-icon128.png"
},
"action": {
"default_icon": {
"16": "assets/img/explosion-icon16.png",
"32": "assets/img/explosion-icon32.png"
},
"default_title": "Explode Tracked Web Pages!",
"default_popup": "action.html"
},
```
👉 Add libraries to manifest
Let's go ahead and reference the libraries we need in our manifest.
1. Edit the `content_script` section, and add `web_accessible_resources` to the end. See documentation for details.
1. If you prefer to copy and paste you can get the full `manifest.json` on Github.
```json
"content_scripts": [{
"matches": [""],
"js": [
"assets/libs/anime.min-3.2.0.js",
"assets/libs/purify-2.3.4.js",
"assets/js/disconnect-tracking-services.js",
"assets/js/functions.js",
"assets/js/keys.js",
"assets/js/explode.js",
"content.js"
],
"css": [
"assets/css/styles.css"
],
"run_at": "document_end",
"all_frames": false
}],
"web_accessible_resources": [{
"resources": ["*.svg", "*.mp3"],
"matches": [""],
"use_dynamic_url": true
}]
```
</div>
</div>
---
## 👉 Test the explosion
 - Refresh your extension and click the action icon to see the popup (you may need to click the puzzle piece see or pin it).
- If everything worked you'll see a line that says `Press e + ~ to test`.
- Before you test, know that you can reset the page by clicking reload.
---
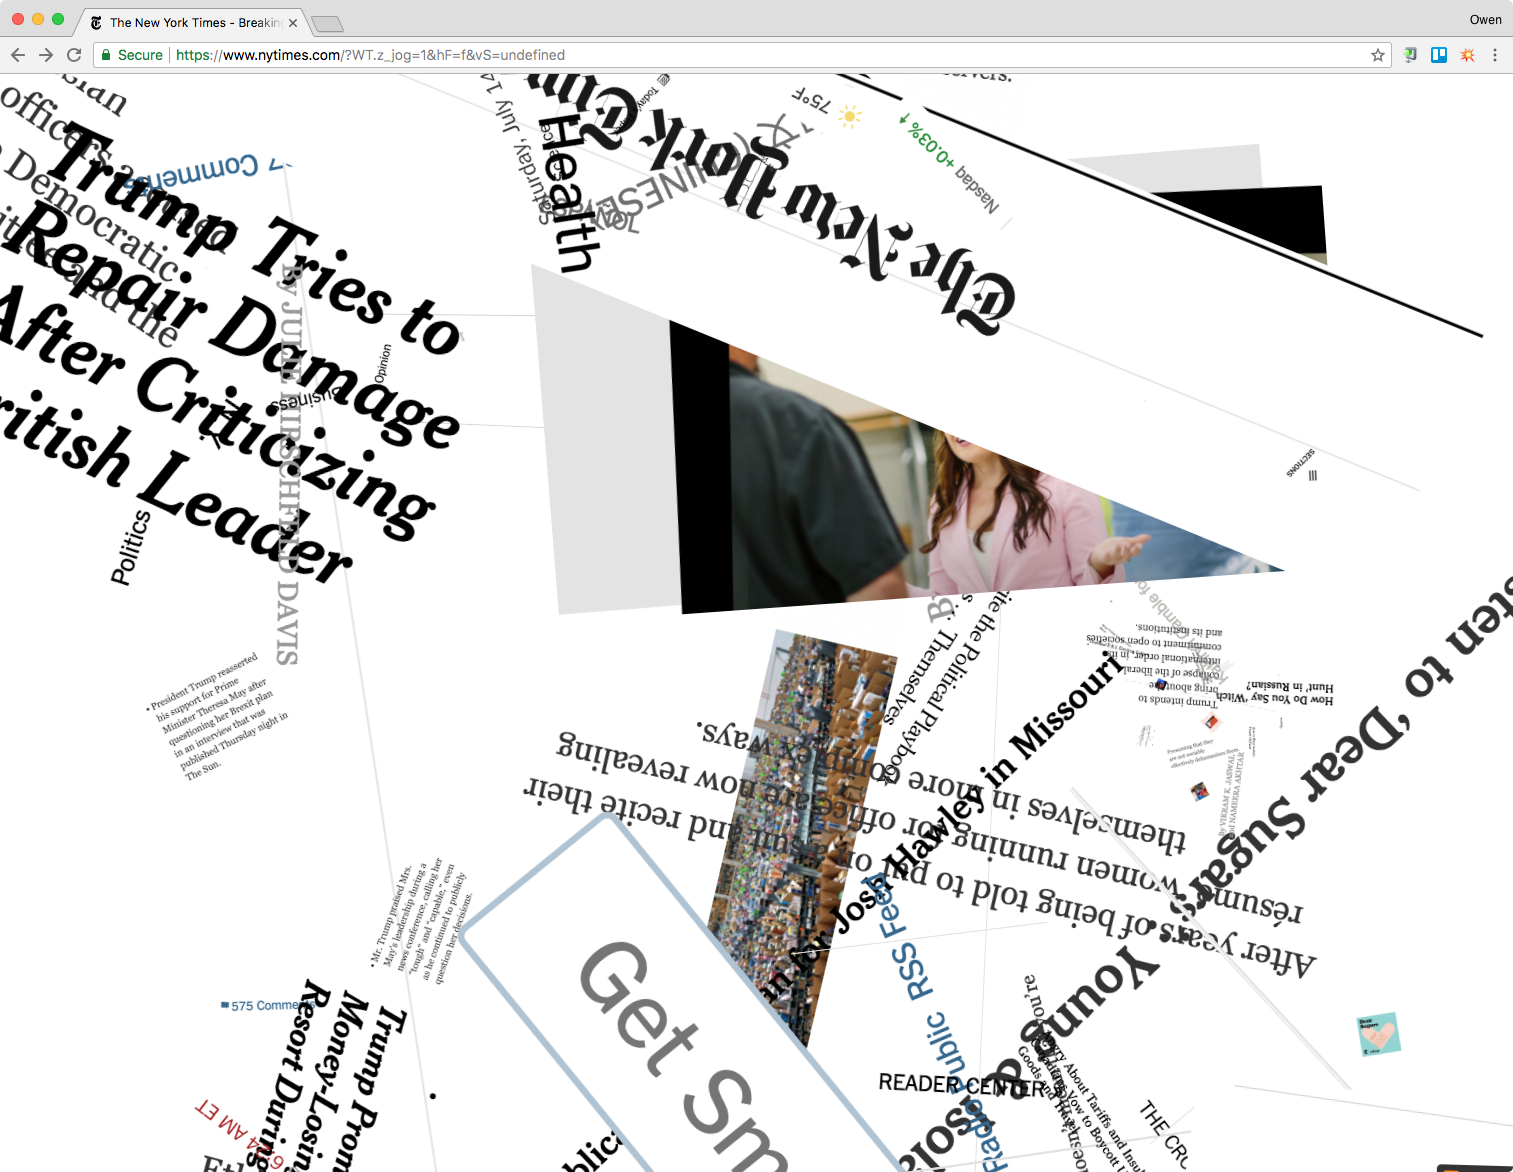
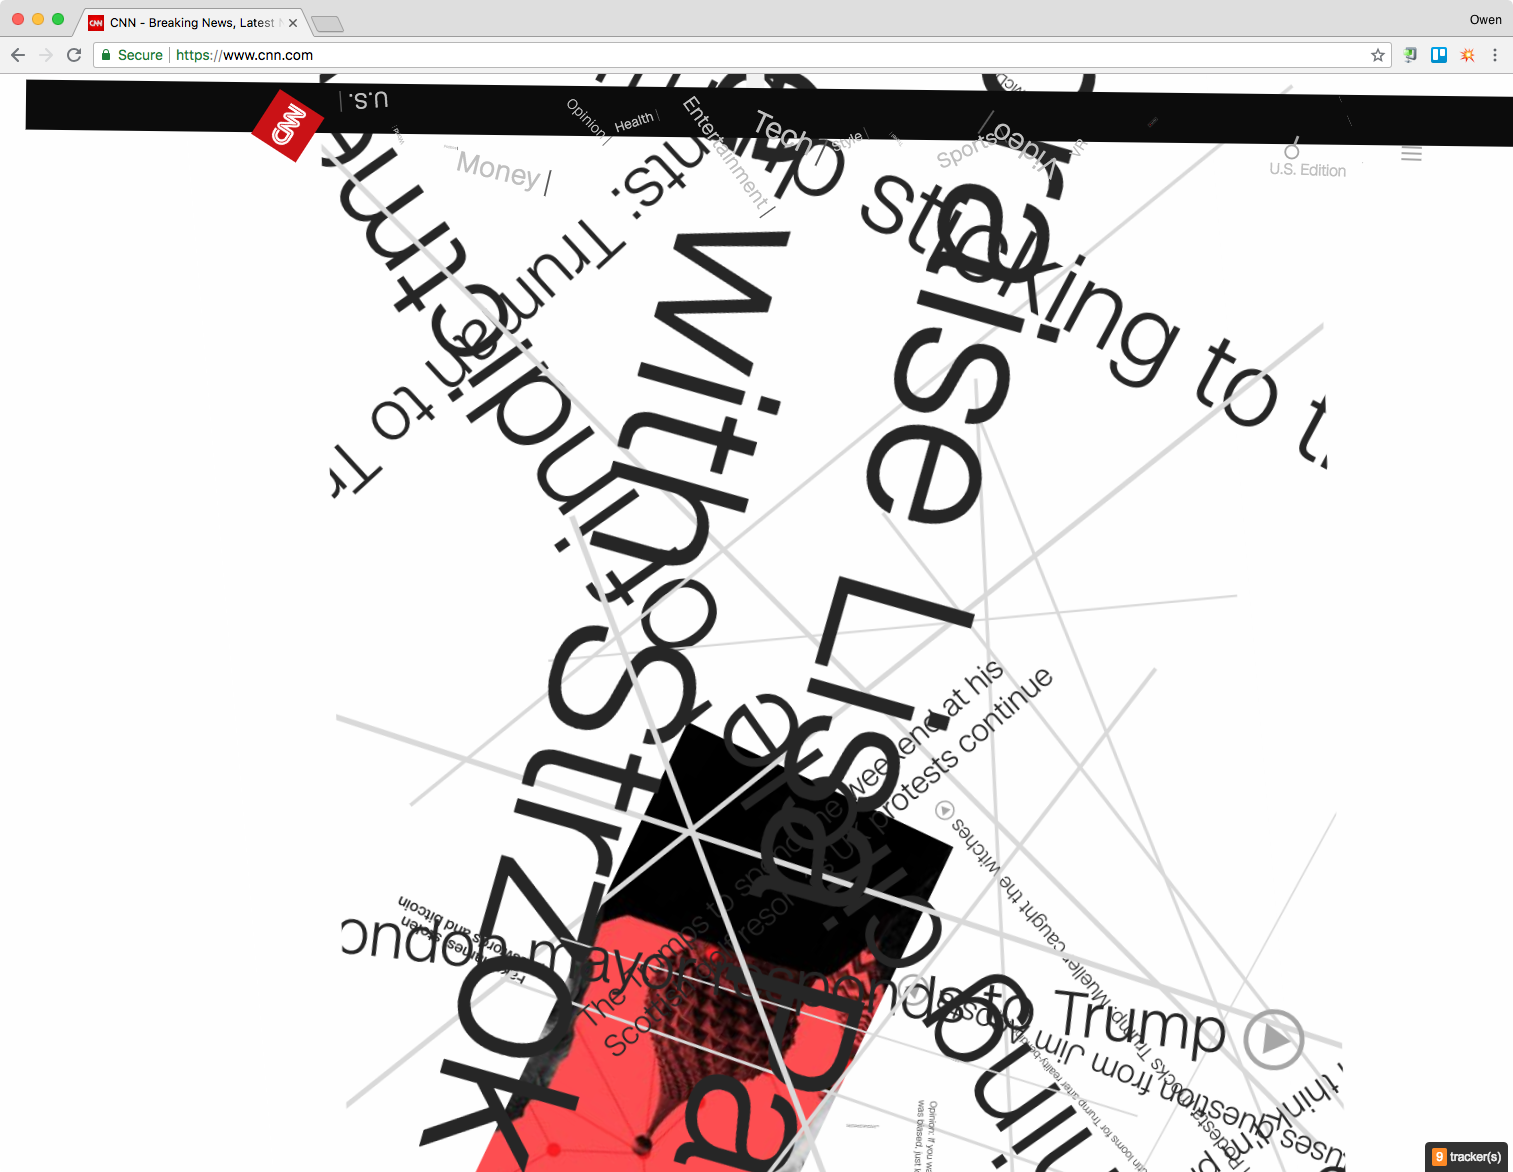
## Explode the Web!
I don't know about you but I enjoy this small function immensely.
- Refresh your extension and click the action icon to see the popup (you may need to click the puzzle piece see or pin it).
- If everything worked you'll see a line that says `Press e + ~ to test`.
- Before you test, know that you can reset the page by clicking reload.
---
## Explode the Web!
I don't know about you but I enjoy this small function immensely.
 ---
## Explode the Web!
The code that makes this work is just Javascript. I'll say two things about it:
- The animation is made possible thanks to Anime.js library. I highly recommend exploring the examples in the documentation.
- I wrote the code that explodes the page. It is open source, and is fairly simple: grabbing all the html elements on a page, and transforming their position, rotation, and scale using random numbers.
---
## 👉 The document object model
With our extension assets ready we can start to build the tracker-tracking function!
1. Add this code to `content.js`
1. Save the file and refresh the extension
1. Open the test page in Chrome [`assets/pages/test.html`](`../../extension/extension-tutorial-final/pages/test.html`) and open the console.
```js
console.log(`💥 The page title is ${document.title}`);
```
---
## The document object model
---
## Explode the Web!
The code that makes this work is just Javascript. I'll say two things about it:
- The animation is made possible thanks to Anime.js library. I highly recommend exploring the examples in the documentation.
- I wrote the code that explodes the page. It is open source, and is fairly simple: grabbing all the html elements on a page, and transforming their position, rotation, and scale using random numbers.
---
## 👉 The document object model
With our extension assets ready we can start to build the tracker-tracking function!
1. Add this code to `content.js`
1. Save the file and refresh the extension
1. Open the test page in Chrome [`assets/pages/test.html`](`../../extension/extension-tutorial-final/pages/test.html`) and open the console.
```js
console.log(`💥 The page title is ${document.title}`);
```
---
## The document object model
 ---
## 👉 Change the DOM in the console
---
## 👉 Get script elements using the DOM
1. Add this code to `content.js` just under the `console.log` function and before the closing `});` to store a reference to all the script elements on each page.
1. Refresh the extension, reload the test page, and you should see all script elements appear in the console as an `HTMLCollection`.
```js
var scriptsFoundArr = document.getElementsByTagName("script");
console.log(scriptsFoundArr);
```
---
## Part 3 conclusion
- We made a lot of progress in this section, adding assets with icons and a test page, hooking up the explode test function, and using the DOM to get scripts.
- In the next section we'll look at these elements and check if they are connecting to tracker domains.
- 👉 Start the next section [Create the Explosion](4-explosion.html)
---
## 👉 Change the DOM in the console
---
## 👉 Get script elements using the DOM
1. Add this code to `content.js` just under the `console.log` function and before the closing `});` to store a reference to all the script elements on each page.
1. Refresh the extension, reload the test page, and you should see all script elements appear in the console as an `HTMLCollection`.
```js
var scriptsFoundArr = document.getElementsByTagName("script");
console.log(scriptsFoundArr);
```
---
## Part 3 conclusion
- We made a lot of progress in this section, adding assets with icons and a test page, hooking up the explode test function, and using the DOM to get scripts.
- In the next section we'll look at these elements and check if they are connecting to tracker domains.
- 👉 Start the next section [Create the Explosion](4-explosion.html)
- Refresh your extension and click the action icon to see the popup (you may need to click the puzzle piece see or pin it).
- If everything worked you'll see a line that says `Press e + ~ to test`.
- Before you test, know that you can reset the page by clicking reload.
---
## Explode the Web!
I don't know about you but I enjoy this small function immensely.
---
## Explode the Web!
The code that makes this work is just Javascript. I'll say two things about it:
- The animation is made possible thanks to Anime.js library. I highly recommend exploring the examples in the documentation.
- I wrote the code that explodes the page. It is open source, and is fairly simple: grabbing all the html elements on a page, and transforming their position, rotation, and scale using random numbers.
---
## 👉 The document object model
With our extension assets ready we can start to build the tracker-tracking function!
1. Add this code to `content.js`
1. Save the file and refresh the extension
1. Open the test page in Chrome [`assets/pages/test.html`](`../../extension/extension-tutorial-final/pages/test.html`) and open the console.
```js
console.log(`💥 The page title is ${document.title}`);
```
---
## The document object model
- The code you added will let you see the title of any page in the console.
- This is possible because browsers load the text of web pages as nested elements, or "nodes".
- This "document object model" or DOM allows us to get (or set!) the attributes of any element via its path in the hierarchy.
The console is interactive, so you can even test this on a live page.
1. Paste this into the console
1. Press return
1. Try other color names
```js
document.body.style.backgroundColor = "red";
```